You make brown food coloring by mixing complementary colors, specifically red and green, or by reducing dark, edible liquids like coffee, cocoa, and burnt sugar into concentrated syrups. The method you choose depends entirely on whether you need a neutral-tasting color for delicate frosting or a rich, flavor-forward tint for chocolate cake batter. The color brown is rarely a single pigment. It is almost always a carefully balanced blend.
The science of brown is more precise than most home cooks realize. On the standard artist’s color wheel, brown is a dark, desaturated composite of red, yellow, and blue, or a direct mix of a primary with its complement. In food, industrial caramel coloring (E150) is made through the controlled heating of sugars, a process called caramelization. This guide teaches you to replicate that chemistry safely in a home kitchen using everything from liquid gel dyes to natural cocoa reductions.
We will cover the exact ratios for mixing standard food coloring, the step-by-step technique for making a deep, smoky burnt sugar dye that rivals store-bought caramel color, and the troubleshooting steps for when your natural berry-based brown turns a disappointing greenish-grey in the fridge. You will leave knowing how to produce any shade of brown, from pale tan to near-black mahogany, with ingredients you already have.
how to make brown food coloring
Brown food coloring is made by combining red and green liquid food coloring in a ratio of roughly 3 parts red to 1 part green, or by mixing equal parts of red, blue, and yellow. The exact ratio depends on whether your food coloring is standard liquid, gel paste, or natural powder, as pigment intensities vary dramatically across brands. Start with the smallest possible amount and adjust incrementally because brown deepens quickly once the colors combine.
The scientific principle here is subtractive color mixing. When you mix red and green pigments, each absorbs a different portion of the light spectrum. The red pigment absorbs green and blue light. The green pigment absorbs red and blue light. Together, they absorb across most of the visible spectrum, reflecting back a muddy, low-saturation tone your eye perceives as brown. Adding a tiny drop of blue or black deepens the shade without altering the base tone.
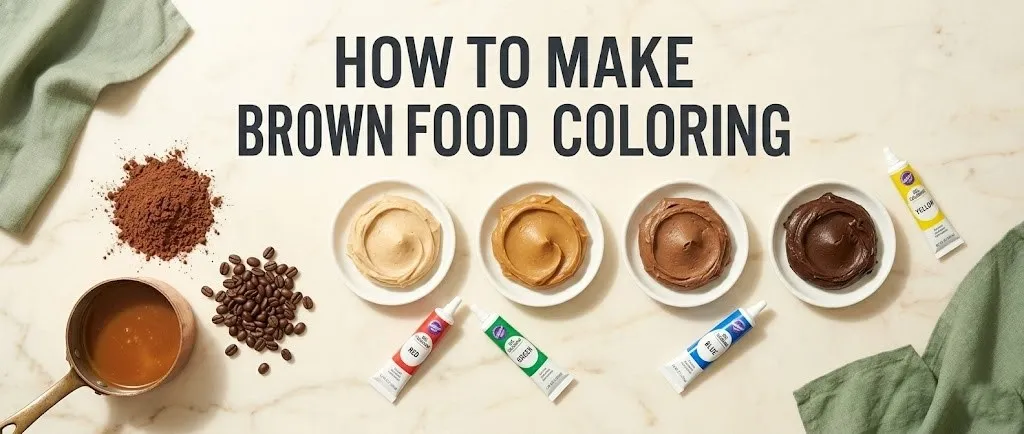
Natural food sources follow the same principle but with messier pigment chemistry. Cocoa powder contains brown pigments called melanoidins, formed when cocoa beans are fermented and roasted. These are the same compounds that give toasted bread and roasted coffee their color. When you reduce coffee or cocoa with water, you are essentially extracting and concentrating these melanoidins into a liquid that acts as a natural dye. The trade-off is that you are also concentrating flavor.
| Method | Base Ingredients | Flavor Impact |
|---|---|---|
| Complementary Color Mix | Red + Green dye (or Red + Blue + Yellow) | Neutral |
| Cocoa Reduction | Cocoa powder + water | Strong chocolate flavor |
| Coffee Reduction | Instant coffee + hot water | Strong coffee flavor |
| Burnt Sugar | White granulated sugar + boiling water | Bitter, smoky caramel |
what colors make brown food coloring
Red and green food coloring combine to make brown, while red, blue, and yellow in roughly equal proportions also produce a rich, neutral brown. This is the standard starting point for anyone with a basic four-color food coloring kit. If you have a standard set of liquid or gel dyes containing the primary colors, you already have the materials for brown.
The color theory operates on a 12-part wheel. The direct complement of red is green. Mixing these two creates a chromatic neutral, a brown that carries no dominant red or green cast. The shade of brown you get from complementary mixing is more neutral than the three-primary method, which often pulls slightly towards violet or orange depending on the specific tones of your blue and yellow. For a true, balanced brown, the red-green method is the fastest route to a clean result.
The intensity of your starting colors dramatically affects the outcome. Standard supermarket liquid food coloring is weak and watery. Achieving a dark brown requires many drops, which can thin out frosting or batter. Gel pastes, like those from Wilton or Chefmaster, are far more concentrated. A single drop of red gel and a toothpick-touch of green gel can produce a deep, rich brown in a cup of white frosting. Always start with the lightest color and add the darker color incrementally.
- Red + Green = Neutral, balanced brown.
- Red + Blue + Yellow = Warm, slightly reddish brown.
- 2 parts Red + 1 part Blue + 1 part Yellow = Rich, dark brown.
- Purple + Yellow = Muted, greyish-brown.
Key Takeaway: If you have a box of four food colorings, you have brown. The ratio is the skill, not the ingredient list.
how to make brown color with food coloring
To make brown color with standard liquid food coloring, begin with 6 drops of red and 2 drops of green mixed into a small white dish. Stir completely and observe the color under good light. If the brown pulls too red, add a single drop of green. If it looks too green or slightly olive, add another drop of red. The adjustment process is never a single pour. It is a slow titration until the undertone disappears.
The white dish is non-negotiable for accurate color mixing. A colored or glass bowl reflects light differently and distorts your perception of the brown. A white ceramic saucer or a white plastic spoon provides a neutral background that reveals the true color. What looks like a warm chestnut in a clear glass bowl may appear garishly red-orange against white frosting. Always test your mixed color against a white surface before adding it to your final dish.
For a large batch of frosting, the ratio scales linearly but requires more careful blending. For 1 cup of white buttercream, start with 3 parts red gel to 1 part green gel, roughly the size of a match head for the red and a grain of rice for the green. Mix thoroughly for at least two minutes to ensure the color distributes evenly. Buttercream with streaks of unmixed red will ruin the effect. The color also develops over a few minutes as the gel fully hydrates and blooms in the fat, so wait before adjusting.
- Gather red and green liquid or gel food coloring, a white dish, and a toothpick.
- Place 6 drops of red into the white dish for a test batch.
- Add 2 drops of green. Stir thoroughly with a toothpick.
- Evaluate the color against white paper under natural light.
- Add green one drop at a time to cancel redness, or red one drop at a time to cancel green tones.
homemade brown gel food coloring
Homemade brown gel food coloring is made by combining cocoa powder, a small amount of hot water, and a neutral-flavored gel base like glucose syrup or clear piping gel. This creates a thick, concentrated paste that adds minimal liquid to batters and frostings compared to a watery reduction. Gel colors are the professional standard because they disperse evenly through fat-based mixtures like buttercream without causing separation.
The function of the gel base is to suspend the pigment particles evenly and prevent them from sinking to the bottom of the mixture. Glucose syrup, corn syrup, or glycerin all work for this purpose. A simple mixture of 1 teaspoon of cocoa powder, 1/2 teaspoon of hot water, and 1 teaspoon of glucose syrup produces a thick, dark brown gel that rivals store-bought chocolate gel paste in color intensity. The hot water blooms the cocoa, releasing the maximum color and flavor.
The advantage of this method over plain liquid reductions is texture control. Adding even a tablespoon of liquid coffee to a delicate cake batter can throw off the liquid-to-flour ratio and create a gummy crumb. A concentrated gel adds negligible liquid. For every tablespoon of homemade gel coloring, you add roughly 3 to 5 milliliters of water, which is well within the margin of error for most standard recipes. The gel also stores in an airtight container in the refrigerator for up to two weeks.
| Component | Purpose | Example |
|---|---|---|
| Pigment Source | Provides color | Cocoa powder, reduced coffee, burnt sugar syrup |
| Liquid | Blooms and extracts pigment | Hot water, coffee, or tea |
| Gel Base | Suspends particles, adds viscosity | Glucose syrup, corn syrup, glycerin |
how to make brown food coloring without chocolate
Brown food coloring without chocolate is made by reducing strong brewed coffee or black tea into a syrup, by caramelizing white sugar into a dark liquid, or by mixing red and green standard food coloring. These methods avoid the distinct cocoa flavor that overwhelms delicate recipes like vanilla cake or lemon frosting where chocolate would be out of place.
Coffee reduction is the most accessible chocolate-free method. Start with 1/2 cup of strongly brewed dark roast coffee or 2 tablespoons of instant espresso powder dissolved in 1/2 cup of boiling water. Pour the coffee into a small saucepan and simmer over medium-low heat until the volume reduces by roughly 75 percent. You are looking for a thick, syrupy consistency that coats the back of a spoon. The color will be intensely dark, almost black, but it reads as a warm brown when mixed into batter or frosting.
Black tea works on the same principle, though the resulting color is lighter and more golden-brown. Strongly brewed Assam or English Breakfast tea, reduced to a syrup, provides a tannic, slightly bitter undertone that works well in spiced cakes. For a flavorless option that uses only color chemistry, the red and green dye method is superior. Combining standard red and green food coloring produces a clean, neutral brown with no added flavor at all, making it the ideal choice for angel food cake, white mountain frosting, or sugar cookies.
- Reduced coffee: Dark, warm brown, strong coffee flavor.
- Reduced black tea: Golden-amber brown, mild bitter-tannin flavor.
- Caramelized sugar: Deep smoky brown, burnt sugar bitterness.
- Red + Green dye: Neutral brown, zero flavor.
Key Takeaway: You do not need chocolate to make brown dye. Caramelized sugar and reduced coffee are the two most potent chocolate-free routes, and standard food coloring is the flavor-neutral fallback.
natural brown food coloring
Natural brown food coloring is derived from cocoa powder, reduced coffee, burnt sugar, date syrup, molasses, or vegetable powders like beet and spinach mixed to a brown hue. These options avoid the synthetic dyes like Red 40, Yellow 5, and Blue 1 that make up standard commercial brown food coloring. For parents of dye-sensitive children and adults avoiding petroleum-derived additives, these pantry ingredients are the safest alternative.
Cocoa powder is the most effective natural brown pigment, but it comes with a caveat. Natural, non-alkalized cocoa powder has a lighter, reddish-brown color. Dutch-processed cocoa, which is treated with an alkalizing agent to neutralize acidity, has a much darker, almost charcoal-brown color and produces a richer dye. The pH of the cocoa affects the final color in your recipe. In an acidic batter like buttermilk pancakes, natural cocoa will shift towards a redder brown. In a neutral batter, it stays stable.
Vegetable-based natural browns use the same complementary color principle as synthetic dyes but with plant pigments that are less stable. Beet powder provides red, and spinach powder or wheatgrass powder provides green. Combined in a 3-to-1 ratio, they produce a dusty brown. The problem is oxidation. Chlorophyll from spinach degrades rapidly when exposed to heat and light, shifting from green to olive to brownish-grey over 24 to 48 hours. A frosting colored naturally today may look muddy tomorrow. Use vegetable-based browns for same-day consumption.
- Cocoa powder (Dutch-processed): Most stable, darkest natural brown.
- Beet + Spinach powder: Works short-term, oxidizes rapidly.
- Molasses: Adds strong flavor, best for gingerbread or spice cake.
- Date syrup: Golden-brown, mild sweetness, good for Middle Eastern desserts.
burnt sugar food coloring
Burnt sugar food coloring is made by heating white granulated sugar in a dry pan until it melts, darkens past amber, and begins to smoke, then carefully deglazing with boiling water to create a dark, bitter liquid that functions as a potent brown dye. This is the culinary equivalent of caramel color, the most widely used food coloring in the commercial food supply, classified internationally as E150.
The chemistry is straightforward but demands attention. Sucrose, the molecule in white table sugar, breaks down under heat through pyrolysis. Between 320°F and 350°F, the sugar melts and begins to form light caramel, which is golden in color. As the temperature climbs past 350°F towards 380°F, the sugar darkens to deep amber, and the caramelization reaction creates polymers called caramelans and caramelens. These molecules are dark brown. The moment you see a wisp of smoke rising from the pan, the sugar has reached the color plateau that produces the most intense dye.
The technique is hazardous for the inattentive cook. The sugar will be roughly 350°F when it reaches the correct darkness. Adding room-temperature water to this molten sugar will cause a violent steam explosion and cause the sugar to seize into a hard, crystalline mass. You must use boiling water and add it slowly, standing back from the pan. Once the bubbling subsides, stir the mixture until the hardened sugar dissolves completely into a thin, dark syrup. This syrup is shelf-stable for months in a sealed jar.
To make burnt sugar food coloring:
- Place 1 cup of white granulated sugar in a heavy-bottomed stainless steel saucepan.
- Heat over medium-high heat without stirring. Swirl the pan occasionally to distribute heat.
- Watch the sugar melt from the edges inward. It will turn clear, then amber.
- When the amber deepens to dark mahogany and a wisp of smoke appears, remove from heat.
- Carefully pour 1/2 cup of boiling water into the pan, standing back to avoid steam.
- Stir until the hardened sugar fully dissolves into a thin syrup. Cool completely.
Key Takeaway: Burnt sugar produces the cleanest, most professional natural brown dye, but it requires strict attention to temperature and the discipline to add only boiling water to avoid a kitchen disaster.
how to make brown frosting
To make brown frosting, start with a fully prepared white buttercream base and add brown coloring in increments, mixing thoroughly between additions to control the shade. The type of coloring you use, liquid, gel, or natural, determines not only the color outcome but the texture of the frosting. Too much liquid dye will break a buttercream emulsion, causing it to curdle.
Liquid food coloring is the riskiest choice for frosting. Because it is water-based, adding the 15 to 20 drops often required for a deep brown introduces enough water to destabilize the fat-in-water emulsion of a standard American buttercream. The result is a separated, greasy-looking frosting. If liquid dye is your only option, add a tablespoon of powdered sugar with each round of color to absorb the excess liquid and maintain the texture.
Gel paste coloring is the professional standard for frosting. A single drop of brown gel paste or the homemade cocoa gel described earlier distributes evenly through the fat without adding water. For a rich chocolate buttercream, use melted dark chocolate as the coloring and flavoring agent. The cocoa butter in the chocolate integrates seamlessly into the buttercream’s fat structure, producing a perfectly smooth, intensely brown result with no risk of separation.
- Start with pure white frosting. Slightly yellow buttercream will shift brown towards orange.
- Use gel paste or melted chocolate to avoid adding water.
- If using liquid dye, add powdered sugar to maintain texture.
- Mix for 2 to 3 minutes after each addition. The color deepens as it blooms.
DIY brown food coloring for cake
DIY brown food coloring for cake batter works best as a cocoa powder slurry, a reduced coffee syrup, or a gel paste mixed into the liquid ingredients before the flour is added. Cake batter is more forgiving than frosting because the flour and eggs provide structural support that absorbs the extra liquid from a homemade dye, within reason.
The cocoa powder slurry is the most reliable method for chocolate cake. Mix 2 tablespoons of Dutch-processed cocoa powder with 3 tablespoons of hot water to form a smooth paste. Add this paste to the liquid ingredients in your recipe, along with the eggs and oil or melted butter. The hot water blooms the cocoa, maximizing its color potential and ensuring an even, dark brown crumb. This method replaces a portion of the total liquid in the recipe, so reduce the milk or water in the original recipe by 3 tablespoons to compensate.
For vanilla or white cake, the burnt sugar syrup or the red-and-green gel method preserves the intended flavor while adding a warm brown hue. Add 1 tablespoon of burnt sugar syrup to the wet ingredients. The bitterness of the burnt sugar is undetectable in a full cake recipe but contributes a subtle toffee note that complements vanilla. The red-and-green gel method adds no flavor at all, making it the sole option for a cake where any trace of coffee or caramel would be unwelcome.
- Cocoa Slurry: For chocolate cake, reduces other liquids by the same volume.
- Coffee Syrup: For mocha or spice cake, adds intense color and flavor.
- Burnt Sugar Syrup: For golden-brown vanilla or caramel cake.
- Gel Paste: For white cake where flavor neutrality is essential.
brown food coloring substitute
The best brown food coloring substitutes are cocoa powder, instant espresso powder, strongly brewed coffee reduced to a syrup, molasses, and maple syrup for lighter browns. The choice depends on whether you want the substitute to also contribute flavor, and whether you are coloring a liquid, a batter, or a frosting.
Instant espresso powder is the most underrated substitute. A teaspoon of instant espresso dissolved in a tablespoon of hot water creates a liquid nearly as dark as commercial brown dye. In chocolate recipes, espresso deepens the existing cocoa flavor without adding a recognizable coffee taste. This is the standard trick in professional bakeries that produce “super-chocolatey” cakes and brownies. The espresso amplifies the melanoidins in the cocoa and adds its own dark pigments.
For a completely flavor-neutral substitute in savory applications like gravy or soup, a tiny amount of Kitchen Bouquet or Gravy Master, both commercial browning and seasoning sauces, works instantly. These products are essentially burnt sugar and vegetable concentrates. They add a negligible savory note and a significant dark brown color. A drop or two is sufficient. Do not pour directly from the bottle into a delicate dish. Measure onto a spoon first.
| Substitute | Best Application | Flavor Impact |
|---|---|---|
| Instant Espresso | Chocolate cake, brownies | Deepens chocolate |
| Cocoa Slurry | Chocolate frosting, batter | Strong chocolate |
| Reduced Coffee | Vanilla cake, cream fillings | Mild coffee |
| Molasses | Gingerbread, spice cake | Strong, spiced |
| Kitchen Bouquet | Gravies, savory sauces | Negligible |
Key Takeaway: The best substitute for brown food coloring is almost always already in your pantry, and instant espresso powder is the secret weapon of professional bakers for adding deep, neutral brown color.
how to make dark brown food coloring
Dark brown food coloring requires a higher pigment concentration and the strategic addition of a blackening agent like blue dye, purple dye, or charcoal powder to deepen the shade beyond what standard brown mixing achieves. Adding more red and green simply creates a darker red-brown. To reach a true dark mahogany or near-black brown, you must shift the tone toward the cooler end of the spectrum.
The color theory of darkening brown is counterintuitive. Adding black dye to brown often produces a flat, muddy grey-brown that looks lifeless against other colors on a decorated cake. The professional approach is to add a tiny amount of blue. Blue deepens brown by cooling the red undertones without desaturating the color into grey. A toothpick tip of royal blue gel paste stirred into a cup of medium-brown buttercream transforms it into a rich, dark espresso brown.
For natural dark browns, the approach is different. Reduce the coffee or burnt sugar syrup further, until it reaches a near-tar consistency. Dutch-processed cocoa, which is darker and more alkaline than natural cocoa, provides a colder, darker brown when used in high concentrations. Combining Dutch cocoa with a small amount of activated charcoal powder produces an intensely dark, nearly black brown that reads as natural and appetizing, not gothic.
- Add blue gel paste, not black, to deepen brown without muddiness.
- Reduce liquid dyes further to concentrate pigment.
- Use Dutch-processed cocoa for colder, darker tones.
- A tiny amount of activated charcoal works in natural applications for a near-black brown.
how to make light brown food coloring
Light brown food coloring is made by diluting a concentrated brown dye with a neutral base or by starting with yellow and a tiny touch of purple to create a pale tan. The technique for light brown is the reverse of dark brown. You begin with a white or pale yellow base and add color in minuscule increments, stopping before the color passes from tan into beige and then into true brown.
The most controllable method is to make a standard brown using the red-and-green method, then mix only a fraction of it into your target medium. Mixing 1 drop of red and a smear of green into a tablespoon of water creates a diluted brown wash. Adding this wash a few drops at a time to white frosting produces a delicate tan. The wash method prevents the over-coloring that happens when you add concentrated dye directly to a full batch.
For natural light browns, a small amount of cinnamon or weak black tea produces a pale, golden tan. Cinnamon disperses as fine brown particles that color frosting without adding significant liquid. The flavor is mild and complementary to most baked goods. A weak brew of black tea, not reduced, added a tablespoon at a time, tints batter a gentle brown that bakes into a warm, golden crumb.
- Dilute a standard brown dye in water before adding to white frosting.
- Start with yellow as a base and add purple or blue in tiny amounts.
- Use ground cinnamon for a natural, pale golden-brown flecked with spice.
- Weak black tea provides a gentle wash for batter without overpowering.
Key Takeaway: The secret to light brown is restraint. Dilute your coloring agent and add it in stages, because crossing from tan to brown happens in a single drop.
Frequently Asked Questions About Making Brown Food Coloring
Can I make brown food coloring with primary colors?
Yes, brown food coloring is made by mixing red, blue, and yellow primary colors in roughly equal parts.
The specific ratio depends on whether your primaries are warm or cool tones, which shifts the final brown towards orange or towards grey.
Test on a white saucer before adding to your recipe.
Why did my homemade brown dye turn green?
Your homemade brown dye likely turned green because the red pigment from berries or beets oxidized and faded, leaving the green and blue pigments dominant.
Natural anthocyanin pigments from berries are highly sensitive to pH and oxygen.
Use cocoa or burnt sugar for a stable natural brown that does not shift color.
What is the healthiest brown food coloring?
The healthiest brown food coloring is a reduction of brewed organic coffee or a slurry of organic cocoa powder, as these are single-ingredient whole foods.
They contain antioxidant polyphenols and no synthetic additives regulated under the FDA Color Additives list.
Burnt sugar is another clean option containing only caramelized sucrose and water.
How do I make brown food coloring without cocoa powder?
Reduce strongly brewed coffee or black tea to a syrup, or mix standard red and green liquid food coloring.
Caramelizing white sugar into a dark, smoky syrup produces a flavor-neutral brown dye.
Beet powder mixed with spinach powder can work short-term, but the color fades within a day.
Why is my brown frosting turning grey?
Your brown frosting is likely turning grey because you added black food coloring instead of blue to darken it.
Black dye contains pigments that desaturate brown into a flat grey as the frosting sets.
Next time, use a tiny drop of royal blue gel paste to darken the brown without killing the warmth.
Homemade brown food coloring is color theory made edible. Once you understand that brown is a composite shade rather than a single pigment, every pantry becomes a dye kitchen. Whether you reach for the red and green gel bottles, the jar of instant espresso, or the bag of white sugar destined for the stovetop, the process is the same: control the ratio, test on white, and add incrementally.
The method that works best is the one that matches your specific project. A neutral-flavored red-and-green blend belongs in a vanilla birthday cake. A rich coffee reduction belongs in a tiramisu. A smoky burnt sugar syrup belongs in a gingerbread. Each produces brown. Each tastes completely different. Match the dye to the dish.
Throw out the rule that says food coloring comes from a plastic squeeze bottle. The real browns live in your coffee grounds, your sugar canister, and your cocoa tin. Use them with precision, and your frosting will be the exact shade of brown you pictured.